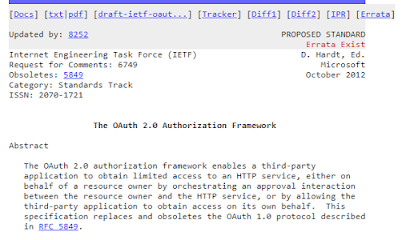
With Microsoft's declaration of intent to remove support of basic authentication for cloud Business Central instances, it's time to start figuring out the not-so-new kid on the block: OAuth. OAuth (Open Authentication) has been around for some time now and it provides many advantages over legacy methods. One of the biggest ones has been Single Sign On. Rather than having to create a multitude of accounts for an ever growing list of websites, you can use you Gmail account or Facebook login. The client site then gets a token that is unrelated to your actual credentials and you have one less password to worry about. Of course, this all comes at a cost and it can be pretty painful if you have any applications that need to be migrated and you are on the bleeding edge where documentation is sparse and a bit confusing. After trudging through the muddy waters of Business Central OAuth documentation, I'm pleased to say I've come out the other side and I can now help you, the reader, keep your virtual shoes just a little less muddy.
Where to begin
Microsoft's documentation is a good place to start but it has some problems, especially if you're using the businesscentral.dynamics.com cloud service. For some reason, all of the examples Microsoft provides assume you're using onmicrosoft.com and I haven't seen anyone using that. With that said, I'm writing this for those of you using the businesscentral.dynamics.com platform.
Per Microsoft's documentation, you will need to add your application (existing or not) to Azure Active Directory (AAD). Because the Business Central tenant is created and managed by Microsoft, you can skip any of the Azure AD tenant setup steps and start at Task 2.
The instructions for registering your application are spot-on and I had virtually no problems with that. I did wonder about using Application Permissions vs. Delegated Permissions but since all of the documentation I had was for Delegated Permissions, I just went with that. It worked out nicely.
Key points:
- You can get to your customer's Azure instance from the CSP menu option in Partner Center. There's an Azure Active Directory link under the customer's Service Management section.
- Save your client id and secret
- Your callback URL can be anything. For instance: "http://mycoolgroovyapp.com". As long as it's a valid URL it should work.
You don't actually need the client secret for the documented process - specifically if you are going to use C# and generate your API classes from a local instance using Windows authentication. I could have done that but I'm stubborn and refused to take the easy way out even though I have my API on a local container. If you are using C# and can't (or don't want to) use a local instance for generating your classes, read on (otherwise, skip to
the part about implementing in C#).
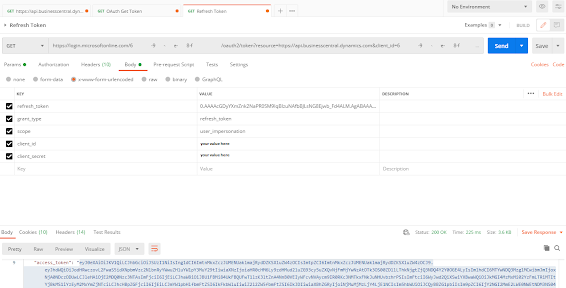
First, get your application ready. This path involves getting an auth token from Postman and the tokens have a short shelf life. If you don't use it in an hour, you lose it and then you either have to go through the process again in Postman or manually use the refresh token to generate a new auth token (I went this route).
Vjeko has a great
writeup on his blog for getting an OAuth token from Business Central. It's a couple years old so the instructions for setting up the application in Azure are a little dated but the Postman section is quite useful. Follow those instructions to get your auth token. Once you have that, you can generate your classes in C#.
The key to using a cloud instance is taking the auth token you have and adding that to the custom headers in the endpoint configuration. This will bypass the need for Windows authentication and a local instance. While I used a production instance, you can specify a sandbox instance for the Address as well. The authentication gives you a token valid for the tenant and this includes all environments.
If you have waited too long to do this and you find that your token has expired, there are two ways to get a new one. You can always create a new one in Postman, or you can use the refresh token (assuming you have it) to generate a new auth token. I took the second route.
The part about implementing in C#
Once my classes were generated, I thought the hard part was over. Not quite. These are the sample configuration lines that Microsoft provides in their example:
// Azure AD registrations:
// Specifies the Azure AD tenant ID
const string AadTenantId = "<mytenant.onmicrosoft.com>";
// Specifies the Application (client) ID of the console application registration in Azure AD
const string ClientId = "<7b235fb6-c01b-47c5-afeb-cbb165abeaf7>";
// Specifies the redirect URL for the client that was configured for console application registration in Azure AD
const string ClientRedirectUrl = "<https://mybcclient>";
// Specifies the APP ID URI that is configured for the registered Business Central application in Azure AD
const string ServerAppIdUri = "<https://mytenant.onmicrosoft.com/91ce5ad2-c339-46b3-831f-67e43c4c6abd>";
The constants aren't what you use for a businesscentral.dynamics.com instance so I had to figure that out by trial and error. In the end, this is what I came up with:
AadTenantId = "https://businesscentral.dynamics.com/xxxxxxxx-xxxx-xxxx-xxxx-xxxxxxxxxxxx"
ClientId = <the client id from Azure>
ClientRedirectUrl = <the redirect URL from Azure>
ServerAppIdUri = "https://api.businesscentral.dynamics.com"
The one that threw me the most was that last one - the ServerAppIdUri. I found it in the resource value of my Postman refresh call.
With that hurdle cleared, there was just one more challenge. I didn't want the customer to have to login every time the application ran as it was an automated download process. In order to make that work, I had to get the token refresh working in C#. That involved snagging a customized TokenCache class from
this blog and adjusting my code to only call the login when necessary.
AuthenticationResult authenticationResult;
AuthenticationContext authenticationContext = new AuthenticationContext("https://login.microsoftonline.com/" + AadTenantId, new FileTokenCache(ProgramDataFolder + "\\BCDownload\\TokenCache.dat"));
if (authenticationContext.TokenCache.Count != 0)
authenticationResult = authenticationContext.AcquireTokenAsync(ServerAppIdUri, ClientId, new Uri(ClientRedirectUrl), new PlatformParameters(PromptBehavior.Auto)).GetAwaiter().GetResult();
else
authenticationResult = authenticationContext.AcquireTokenAsync(ServerAppIdUri, ClientId, new Uri(ClientRedirectUrl), new PlatformParameters(PromptBehavior.SelectAccount)).GetAwaiter().GetResult();
This was the last step to getting my application converted. I hope this saves someone a bit of frustration.


Comments
Post a Comment